Recruitment (ATS)
The Recruitment module is a full applicant-tracking system built into your workspace. You raise an internal job opening, publish a public posting to your careers site, collect applications, move candidates through a kanban pipeline, schedule interviews, extend offers, and finally convert a hire into an employee — which starts onboarding automatically.
Recruitment lives under the Recruitment section of the admin menu:
- Job Openings —
/admin/recruitment/jobs - Candidates —
/admin/recruitment/candidates
Your public careers site is served separately at /careers and needs no login.
Who can use it
Three permissions control access:
| Permission | What it allows |
|---|---|
recruitment.view | Read-only access to openings, candidates, and applications |
recruitment.manage | Full control — create openings, publish postings, move stages, schedule interviews, extend offers, convert to employee |
recruitment.interview | Submit interview feedback as a panel member |
Interviewers do not need recruitment access to see the interviews they are on — anyone assigned to a panel sees them under My Interviews (/portal/interviews) in the employee portal.
Job openings
A job opening is your internal requisition — the role you are hiring for, before anything is made public.
Create an opening
On Job Openings, click New opening and fill in the title (required) plus optional department, designation, employment type, and headcount. New openings start in Draft.
Openings move through these statuses:
| Status | Meaning |
|---|---|
| Draft | Being set up; not yet approved to hire |
| Open | Approved and actively hiring — the only status that can be published, and the only one the careers site lists |
| On hold | Paused |
| Filled | Headcount reached (set for you when you convert a hire) |
| Cancelled | Closed without hiring |
Open an opening to see three tabs: Details, Posting, and Applications.
- Details lets you edit headcount and internal notes, and change the status from the sidebar. Moving an opening to Open stamps the approval. Moving it anywhere else (On hold, Filled, Cancelled) also unpublishes its posting, so the careers site and the Publishing panel agree; move it back to Open and publish again to relist it. The view count is kept.
- Posting is the public advert (below).
- Applications is the kanban pipeline (below).
An opening must be in Open status before you can publish its posting or add applications to it.
The public careers site
Your careers site is a fast, search-engine-friendly set of pages rendered by the server — no login, clean URLs.
| Page | URL |
|---|---|
| Careers landing (all open roles, grouped by department) | /careers |
| A single job with an apply form | /careers/{slug} |
| Thank-you page after applying | /careers/thank-you |
| Sitemap for search engines | /sitemap.xml |
Writing and publishing a posting
On an opening's Posting tab, fill in:
- Slug — the URL-safe address of the page (leave blank to auto-generate from the title; a number is appended if it collides)
- Location and Remote policy (On-site / Hybrid / Remote)
- Description (required), What you'll do, What we're looking for, and Benefits
- Salary min / max / currency and whether the range is per month or per year (shown after the range on the public page and sent to search engines as the unit), plus a Show salary range on the public posting toggle — the range is only ever shown publicly when this is ticked
Click Save draft, then Publish to careers page. The opening must be Open to publish. Once live, the panel shows how long it has been published, a link to the public page, and a running view count. Unpublish takes it back off the site at any time.
Search-engine optimisation
Every published job page is built for discovery:
- Google for Jobs structured data (schema.org
JobPostingJSON-LD) is embedded, including title, description, posting date, hiring organisation, location, employment type, and salary (when visible). - Each page carries its own SEO meta description.
/sitemap.xmllists the careers landing page plus every published opening so crawlers find them.
If your workspace has an active custom (white-label) domain, your careers pages, sitemap, and job links are served under your own domain and branding instead of the platform domain.
How candidates apply
A candidate opens a job page, fills in the apply form (name, email, optional phone, LinkedIn, current employer, cover letter), and attaches a CV. On submit they land on the thank-you page and receive a confirmation email.
Behind the scenes the system matches on email: applying twice with the same address updates the same candidate and application rather than creating duplicates, and never overwrites a decision you have already made.
Candidates
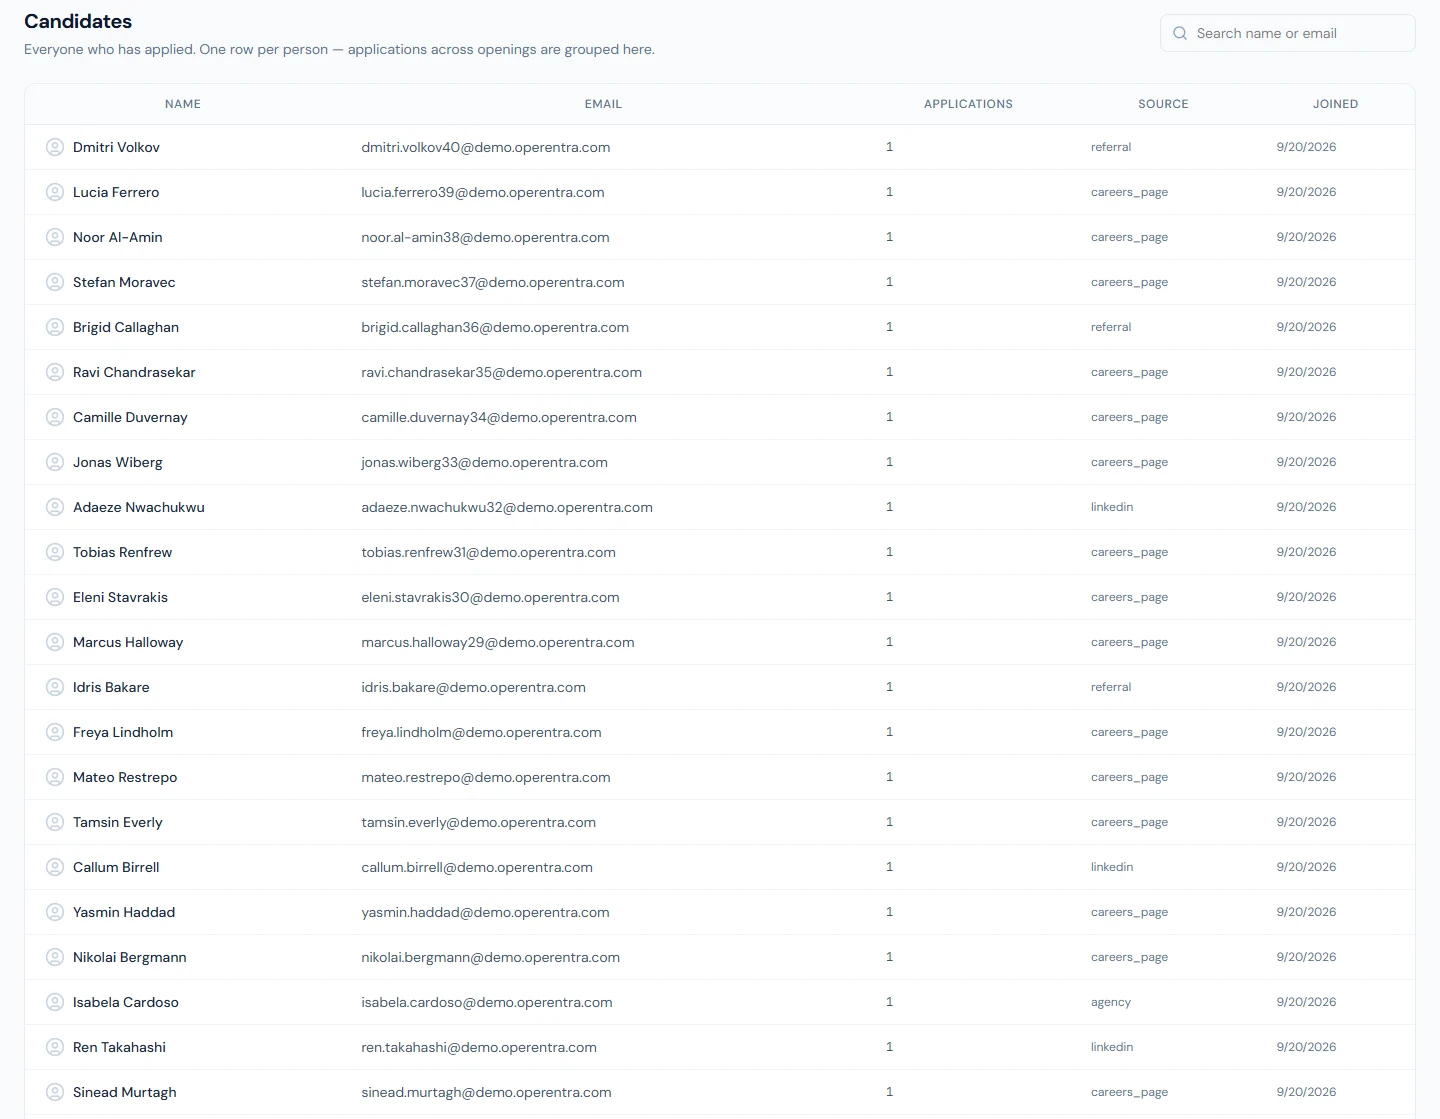
The Candidates page lists everyone who has applied — one row per person, with their applications across all openings grouped together. Search by name or email. Open a candidate to see their contact details, CV, and application history.
Applications and the kanban pipeline
Each application is one candidate applied to one opening. The Applications tab of an opening shows a kanban board with a column per stage:
Applied → Screening → Interview → Offer → Hired
Rejected and withdrawn applications are kept separately (rejected ones appear in a collapsible list at the bottom).
Adding a sourced candidate manually
For candidates you found yourself (LinkedIn, a referral, a headhunter), click Add candidate manually on the Applications tab. Enter their details and a source, and they enter the pipeline at Applied with a confirmation email — just like a public applicant.
Working an application
Click any card to open the application. The detail page shows a stage stepper and the actions available at the current stage:
- Move to next stage — advances one step (for example Applied to Screening).
- Schedule interview — appears at the Interview stage (see below).
- Extend offer — appears at the Interview or Offer stage when no offer exists yet; while an offer is out (sent, or sent and expired) it reads Revise offer, opens with the current terms, and updates the same offer and candidate link.
- Convert to employee — appears once the candidate is hired (or has an offer).
- Reject — always available; a reason is required and is emailed to the candidate.
You cannot jump straight to Offer with the plain "move to next stage" button — you must use Extend offer so a real offer (with letter, link, and email) is created. Likewise, moving to Hired while an offer is out is done by the candidate accepting the offer, not by hand.
The application page also shows the cover letter, all interviews with their feedback, the offer, and a candidate sidebar with contact links and a CV download.
Interviews
Scheduling
On an application at the Interview stage, click Schedule interview. In the dialog set:
- Title, date/time, and duration — the date and time are in your workspace's time zone (Company Profile), whatever zone your own computer is in; the dialog names the zone under the field
- An optional branch — picking one auto-fills the location with the branch address (you can still edit it to add a floor or room)
- An optional meeting link for remote interviews
- One or more interviewers — hold Ctrl/Cmd to select several; the first is the primary interviewer
Saving does several things at once:
- The application advances to the Interview stage if it wasn't already.
- The candidate gets an email with the interview details, a calendar
.icsattachment, and a personal link to confirm. - Each interviewer gets a heads-up email with the same calendar invite.
The interview time is shown in the workspace's time zone everywhere: on the application, in the emails, on the candidate's page, under My Interviews and in the portal dashboard's upcoming interviews. The .ics invite carries the exact moment, so each calendar app shows it in its own owner's zone.
The candidate confirmation page
The candidate's link opens a no-login page at /careers/interview/{token} where they can Confirm or Request a reschedule (with a short note). Their response — Confirmed, Reschedule requested, or Awaiting — is shown on the application, and interviewers are notified when the candidate acts. The candidate can also re-download the .ics invite from that page.
Reminders
An automatic reminder is sent about 24 hours before each scheduled interview — one to the candidate, one to each interviewer. Reminders are sent once and won't duplicate on repeated runs.
Interviewer portal and feedback
Panel members open My Interviews (/portal/interviews) in the employee portal to see the interviews they are on and submit feedback: a 1–5 rating, a recommendation (strong_no, no, yes, strong_yes), optional per-competency scores, and free-text strengths, concerns, and notes. Feedback appears back on the application for the hiring team.
Offers
Extending an offer
Click Extend offer on the application and enter the proposed monthly salary, joining date, offer expiry date, and internal notes. On send, the system:
- Creates the offer and moves the application to the Offer stage.
- Renders an offer-letter PDF.
- Emails the candidate with the offer details, the PDF attached, and a link to respond.
The candidate offer page
The candidate's link opens a no-login page at /careers/offer/{token} where they can Accept or Decline (a reason is required to decline) and download the offer-letter PDF.
- Accept moves the application to Hired and notifies the hiring manager and the person who issued the offer.
- Decline moves the application to Withdrawn, records the reason, and notifies the same people.
- An expired offer (past its expiry date) can no longer be accepted from the link; the Offer card on the application shows it as Expired. Revise it to give the candidate a new window.
Back on the application, the Offer card shows the current status, links to the candidate offer page and the PDF, and — if declined — the candidate's reason.
Convert to employee (handoff to onboarding)
Once a candidate is Hired (or has an active offer), the application shows a Convert to employee prompt. This opens the employee create form at /admin/employees/create?applicationId=..., pre-filled from the candidate and their offer. Review and complete the remaining details (department, designation, employment type, official email, joining date, and so on), then create the record.
Creating the employee this way:
- Links the candidate to the new employee so they can't be converted twice.
- Automatically spawns the onboarding pipeline for the new hire — no extra step. See the onboarding guide for what happens next.
- Marks the job opening Filled once its headcount is reached.
Because conversion runs through the normal Add Employee flow, everything that a manual new hire gets — a login account, the default onboarding checklist, and the welcome sequence — applies to a converted candidate too.
Automated emails
Recruitment sends templated emails at each key step. All of them are managed alongside your other templates, so you can edit the wording:
- Application received — to the candidate when they apply (public or manual entry)
- Application rejected — to the candidate, with your reason
- Interview scheduled and Interview reminder — to the candidate, with the
.icsinvite - Interviewer invited, candidate confirmed, and reschedule requested — to the panel
- Offer extended — to the candidate, with the offer-letter PDF
- Offer accepted / declined — to the hiring manager and the offer issuer
If a template isn't configured for a trigger, that particular email is simply skipped — the pipeline action still succeeds.