Asset management
The Assets module is your company's register of physical, company-owned equipment — laptops, desktops, phones, SIMs, access cards, monitors, headsets and anything else you hand out to staff. It records what you own, who is currently holding each item, and the full history of every issue and return so nothing goes untracked.
Admins work from the Assets area of the admin app (/admin/assets). Employees see only the
items issued to them, on their My Assets portal page (/portal/assets).
Who can do what
Access is controlled by three permissions. A workspace admin can grant these to roles from the Access Control screens.
| Permission | Grants |
|---|---|
assets.manage | Full control — add, edit and delete assets, manage categories, and issue/return items |
assets.view_all | Read-only view of the whole asset register and each item's history |
assets.view_own | See only the assets issued to you, on the portal My Assets page |
In the default roles, HR roles get assets.manage, managers and accountants get assets.view_all,
and every employee gets assets.view_own.
Asset categories
Every asset belongs to a category, which groups items by type. Open Assets → Categories
(/admin/assets/categories) to manage them.
Each workspace starts with eight ready-made categories:
| Category | Typical use |
|---|---|
| Laptop | Company-issued laptops and notebooks |
| Computer | Desktop PCs and workstations at fixed seats |
| Phone | Mobile phones (sales, support, on-call) |
| SIM | Corporate SIM cards on the company mobile plan |
| RFID / Access Card | Building access cards, parking tags, datacenter badges |
| Monitor | External monitors and displays |
| Headset | Headsets and audio peripherals |
| Other | Catch-all for anything that doesn't fit above |
To add your own, click New Category and give it a name (required), an optional icon name and a description. Category names must be unique within your workspace.
Deleting a category that still has assets attached does not remove it — the system marks it Inactive instead, so the historical assets that point to it stay readable. Inactive categories are hidden by default; tick Show inactive to see them. Only an empty category is fully deleted.
Registering an asset
From Assets → All Assets (/admin/assets), click Add Asset and fill in the form:
| Field | Notes |
|---|---|
| Asset tag | Your internal label, e.g. LAP-014. Required and must be unique in the workspace — a deleted asset keeps its tag, so it cannot be reused |
| Category | Required — pick from your active categories |
| Name | Required, e.g. "ThinkPad X1 Carbon Gen 11" |
| Serial number | Optional manufacturer serial |
| Condition | New, Good, Fair or Poor (defaults to Good) |
| Purchase date | Optional |
| Purchase cost | Optional amount |
| Warranty expiry | Optional |
| Vendor | Optional supplier name |
| Notes | Optional free text |
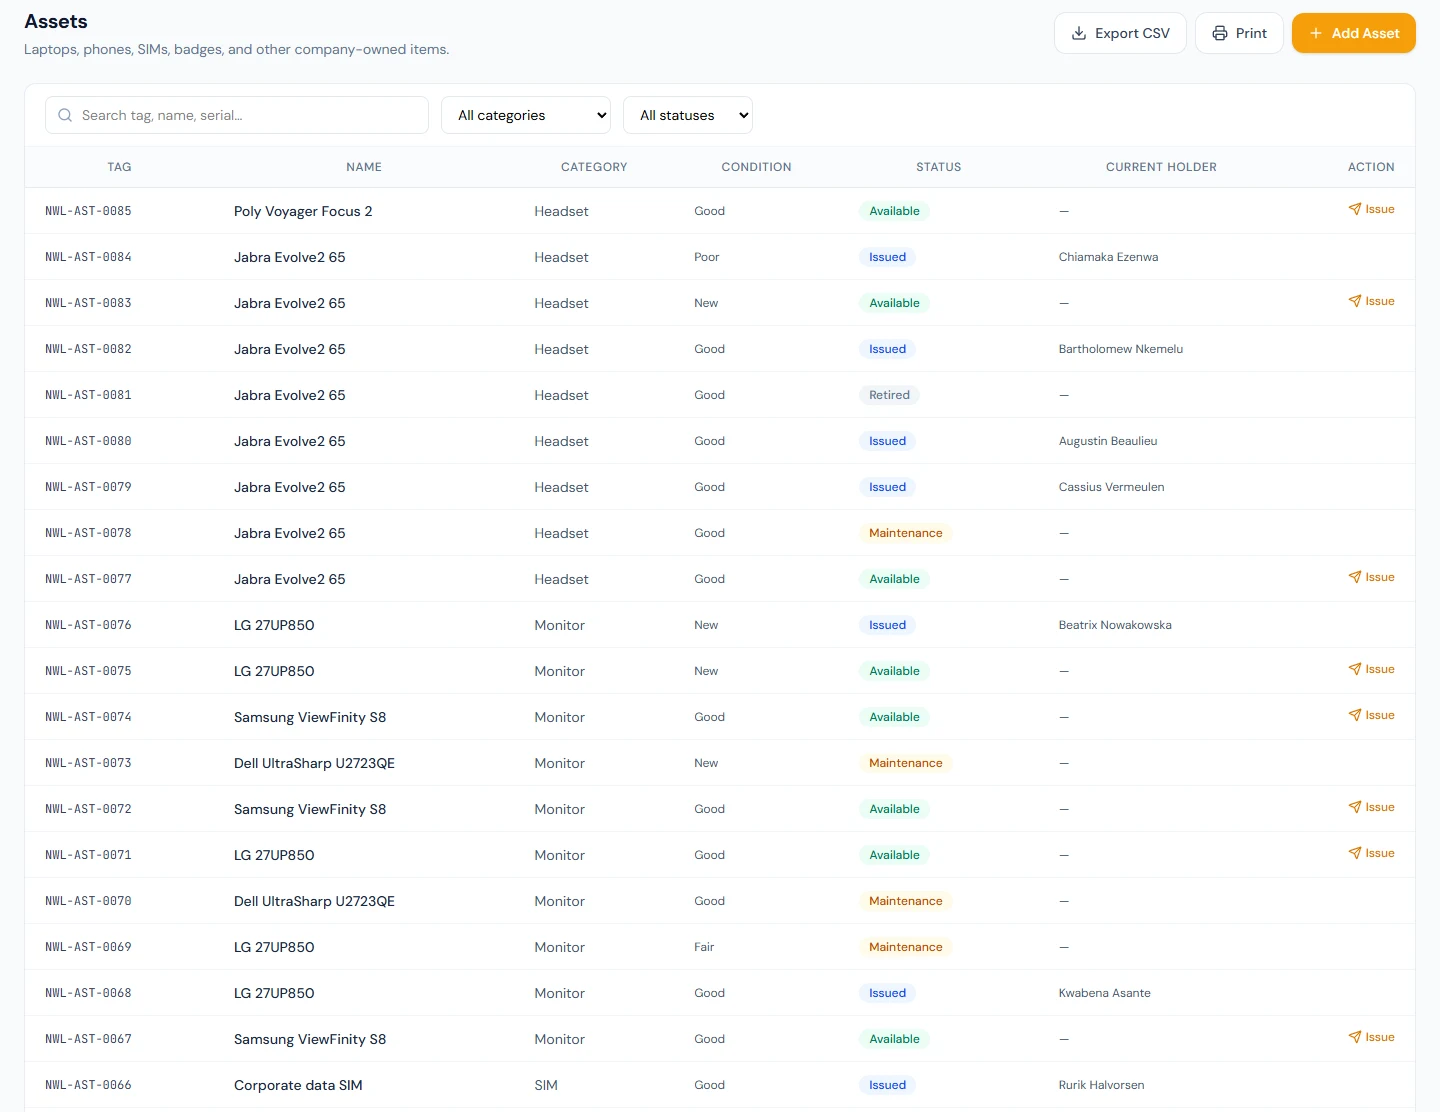
New assets start with the status Available. After saving, you land on the asset's detail
page (/admin/assets/:id), where you can issue, edit or delete it.
Statuses and conditions
An asset always has one status and one condition.
- Statuses: Available, Issued, Maintenance, Retired, Lost.
- Conditions: New, Good, Fair, Poor.
Status changes automatically as you issue and return items (see below). You can also set Maintenance, Retired, Lost or back to Available manually from the Edit screen — but the Issued status is reserved: an item only becomes Issued by issuing it, and only leaves Issued by returning it. The status dropdown is locked while an item is issued.
The issue / return cycle
This is the heart of the module: handing an item to an employee and later taking it back, with every step recorded.
Issuing an asset
You can issue any asset whose status is Available, either from the Issue link on its row in the register or the Issue button on its detail page.
- Search for and select the employee who will hold the item. The picker lists active employees only; only they can receive assets.
- Optionally set the issued condition (leave blank to inherit the asset's current condition).
- Optionally set an expected return date — this drives the overdue reminders described below.
- Optionally add notes (accessories, charger, sleeve, etc.).
- Click Issue.
The asset flips to Issued, the employee becomes its current holder, and an asset issued email is sent to them automatically.
Returning an asset
When an item comes back, open its detail page and click Return. Choose an outcome, which decides where the asset lands:
| Outcome | What happens to the asset |
|---|---|
| Returned (intact) | Goes back to the Available pool |
| Returned (damaged) | Moves to Maintenance for review |
| Lost / not returned | Marked Lost, assignment closed |
You can also record the returned condition (or leave it as "No change") and add notes such as "cracked screen" or "missing charger". Confirming the return closes the current assignment and sends an asset returned email to the employee who was holding it.
Assignment history
Every issue and return is stored as an assignment record, giving you two complementary views.
- Per asset: the detail page (
/admin/assets/:id) shows an Assignment History table — each holder, when it was issued and returned, the condition at each end, an outcome badge (Active, Returned, Damaged, Lost) and any notes. - Per employee: the employee's own history appears on their portal My Assets page, and admins can filter the register by employee to see who holds what.
Because history is preserved, deleting an asset is a soft delete — it disappears from the register but its past assignments remain intact. An asset that is currently Issued cannot be deleted; return it first.
Overdue reminders and the daily digest
Two automated emails keep custody on track (they run on the platform's scheduled jobs).
- Overdue return nudges — from 09:00 workspace time, the system finds assignments whose expected return date has passed and emails the holder an overdue return reminder that includes how many days it is overdue. An employee is nudged at most once a day, and the reminders stop once the item is returned or if the employee is no longer active.
- Daily HR handover digest — at 18:00 workspace time, anyone in the workspace holding
assets.managereceives a summary of the issue and return activity of the 24 hours since the previous digest, highlighting any items returned damaged or lost. The digest is skipped on days with no activity.
Overdue reminders only work when you set an expected return date at issue time. For open-ended handouts (a permanent laptop, say), leave it blank and no reminder is scheduled.
Employee view: My Assets
Employees open My Assets (/portal/assets) in the self-service portal to see everything
issued to them. The page has two sections:
- Currently Holding — items they have right now, with the tag, asset name and category, the issue date, the expected return date (if any), the condition it was issued in, and any notes.
- History — items they previously held, showing the dates held, the outcome badge, and notes.
The page needs a linked employee profile; a login with no employee record simply sees an "employee profile linked" prompt instead.
Exporting and printing
The register at /admin/assets supports quick searching (by tag, name or serial), filtering by
category and status, and two output options:
- Export CSV — downloads the current filtered list as a spreadsheet.
- Print — opens a clean Asset Register print sheet for a hard copy.
Email notifications at a glance
The module sends four automatic emails, each editable under your workspace email templates:
| Trigger | When it fires | To whom |
|---|---|---|
asset_issued | An asset is issued | The receiving employee |
asset_returned | An asset is returned | The employee who held it |
asset_overdue_return | An expected return date has passed | The holder |
asset_handover_summary | End-of-day summary of the day's activity | Users with assets.manage |