Onboarding & offboarding
Your workspace tracks the full employee lifecycle. When you add a new hire, an onboarding pipeline is created automatically. When someone leaves, you open a separation that walks HR through a clearance checklist and a one-click final settlement. This page covers both.
- Onboarding lives at
/admin/onboarding - Probation confirmations live at
/admin/employees/probations - Offboarding lives at
/admin/offboarding
Onboarding
The pipeline is created for you
You do not start onboarding by hand. The moment you create an employee, a pipeline with a default checklist is spawned for them and appears under Onboarding (/admin/onboarding). Each pipeline shows the employee, designation, joining date, a status, and a progress bar. Rehiring a former employee starts a new pipeline the same way, in place of their earlier one.
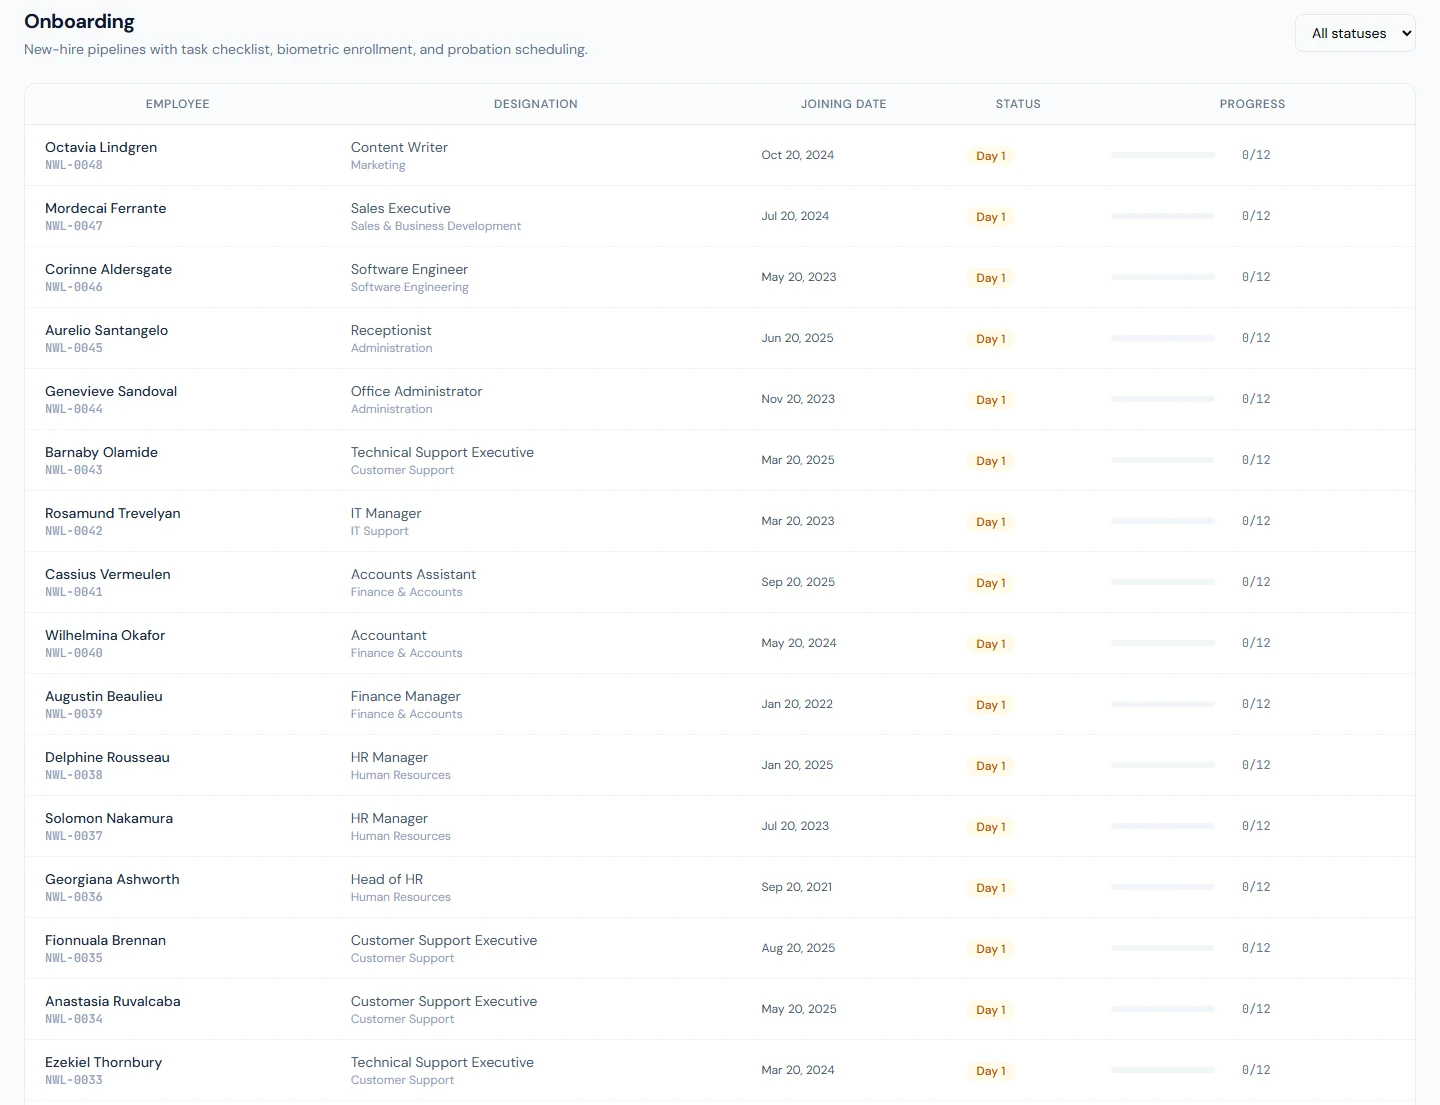
A pipeline starts in one of two statuses depending on the joining date:
| Status | Meaning |
|---|---|
| Preparing | Joining date is still in the future. |
| Day 1 | Joining date has arrived. |
| Ramping | At least one task is done and the employee has joined. |
| Completed | All required tasks are done or waived. |
| Cancelled | Pipeline was closed without completing: by HR, or automatically when the employee's final settlement is completed. |
The status advances on its own: Preparing flips to Day 1 once the joining date passes, and the pipeline auto-completes when every required task is finished.
The default checklist
Every new pipeline is seeded with the same twelve tasks. Due dates are set relative to the employee's joining date (some fall before day one).
| Task | When it's due | How it's done |
|---|---|---|
| Send pre-joining email | 7 days before joining | Click Run to send the welcome + documents email |
| Prepare computer | 2 days before joining | Manual — tick it off yourself |
| Create portal account | Joining day | Closes itself once a login exists for the employee |
| Assign salary structure | Joining day | Opens /admin/payroll/salaries; closes when a salary is assigned |
| Create employment contract | Joining day | Opens /admin/contracts/create; requires a salary structure first (the contract states the same gross salary payroll pays); closes itself once a contract exists |
| Contract accepted or signed | Joining day | Opens /admin/contracts; closes itself once the employee accepts in their portal or HR uploads the signed copy |
| Enroll on biometric device | Joining day | Click Run to push to the attendance device. Needs a plan that includes biometric devices — otherwise the button shows a lock; the task still closes itself if the employee is already on a device, and you can waive it |
| Issue assets (computer, SIM, badge) | Joining day | Opens /admin/assets; closes once any asset is issued |
| Day-1 orientation | Joining day | Manual |
| Send welcome email | 1 day after joining | Click Run to send |
| Confirm leave group assignment | 3 days after joining | Opens /admin/leave/groups; closes when a leave group is set |
| Schedule probation review | 30 days after joining | Closes when a probation appraisal exists (see below) |
Contract accepted or signed is the task that activates the employee. Until it is done, they stay New (Pending Activation) and are excluded from payroll, attendance, and leave. See Employees for statuses and activation, and Contracts & HR letters for the two ways a contract gets signed.
Tasks come in three kinds:
- Manual — you mark them done.
- Action — they have a Run button that performs the step (send an email, push to biometric, schedule the probation review).
- Link — they open the relevant admin screen so you can complete the work there.
When new default tasks are added to the product, onboarding pipelines still in flight pick them up automatically — opening a pipeline backfills any checklist items it is missing, with due dates computed from the joining date. Completed or cancelled pipelines are history and are never touched, and backfilling only ever adds tasks — it never alters or reopens existing ones.
Tasks that complete themselves
Several tasks watch the real state of your workspace and close automatically. Each time you open a pipeline, the system re-checks whether the underlying work is already done and ticks the task off — for example, it marks Assign salary structure done once an active salary assignment exists, Create employment contract done once any contract exists for the employee, Contract accepted or signed done once a contract is accepted electronically or a signed copy is on file (its summary notes that the employee was activated), Issue assets done once any asset has been handed to the employee, and Enroll on biometric device done once the record is on a device. For a rehired employee, the contract, asset and probation-review checks count only what was made after the rehire, not what the earlier employment left on file.
Each task closed this way keeps a short note of what the check found, with amounts in your workspace currency, dates written out, and the contract type by its name: for example Active salary assigned (gross $ 5,600, effective 15 Oct 2026). or Contract NWL-CTR-0050 created (Permanent, starts 15 Oct 2026).
Auto-checks only ever move a task forward to Done. They never re-open a task you completed and never override one you Waived.
You can also assign a task to a specific user; they receive a notification email. When all required tasks are Done or Waived, the pipeline is marked Completed and a completion email goes to the employee.
Managing onboarding requires the onboarding.manage permission; viewing requires onboarding.view.
Probation & confirmation
New hires with a probation end date appear on the Probations page (/admin/employees/probations). It lists everyone still on probation, when their probation ends, and how many days remain — overdue people are flagged in red. Use the Include overdue toggle to show or hide those whose probation has already lapsed.
Reminders and automatic scheduling
You don't have to watch this list every day. A daily job (09:15, workspace time) does two things:
- Reminder digest — emails HR a summary of every employee whose probation ends within the next 14 days (and any already overdue).
- Auto-schedule the probation review — when probation is within 30 days, it creates a "Probation Review" appraisal cycle for that person automatically, provided you have an active probation appraisal template. This is the same step the onboarding checklist's Schedule probation review task performs.
Confirming an employee
When probation is over, click Confirm next to the employee. A dialog lets you:
- Set the Confirmation Date (defaults to today).
- Leave Auto-issue confirmation letter and email to employee ticked (recommended).
On confirm, the employee is stamped as confirmed, a confirmation letter is generated through HR Letters (using your active confirmation-letter template), and the employee is emailed — with the letter PDF attached when one was issued.
Confirming requires the employees.confirm permission.
An employee can only be confirmed once. If you re-open the dialog on someone already confirmed, the action is rejected.
Offboarding
Offboarding is handled through separations at /admin/offboarding. Each row shows the employee, separation type, dates, clearance progress, and the final settlement amount once settled.
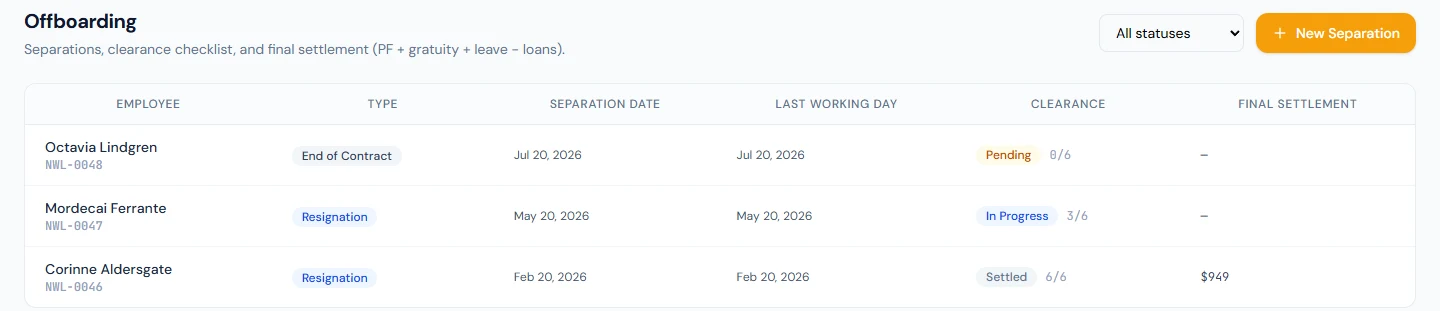
Start a separation
Click New Separation and fill in the form below. You can also start from the employee's profile: Start offboarding at the bottom of the Status menu opens this form with the person already chosen. That is also the way to offboard someone who is not Active (On Leave or Suspended, say), since the employee search here lists active employees only.
| Field | Notes |
|---|---|
| Employee | Search active employees by name, code, or email |
| Type | Resignation, Termination, Retirement, End of Contract, Death, or Absconding |
| Notice Date | Optional |
| Separation Date | Required |
| Last Working Day | Optional |
| Reason | Internal notes only — not shown to the employee |
Creating the separation notifies HR and the employee (sent to both official and personal email, since the official mailbox is often disabled around separation).
An employee can have only one open separation at a time, and someone already marked separated cannot have a new one started. Settle or cancel the existing record first.
The clearance checklist
Every separation opens with a clearance checklist of five items, or six for an employee with a provident fund. The auto-flagged items reflect live data and refresh each time you open the record:
| Auto-flagged item | Marked done when… |
|---|---|
| Assets returned | No company assets are still issued to the employee |
| Loans settled | No outstanding loan balance remains |
| Provident Fund settled | A PF settlement type has been chosen (at settlement time). Only for an employee with a provident fund |
The other three are manual — HR ticks them off: IT access revoked, Knowledge transfer, and Exit interview.
An employee has a provident fund when they have a PF ledger: PF contributions from payroll, an opening balance, or any other PF ledger entry. Provident Fund settled is left off everyone else's checklist. If an employee's first PF contribution is posted after their separation was opened, the item is added the next time you open the record. A separation that lists it for an employee without a provident fund shows it as done, with "No provident fund for this employee: nothing to settle."
Because auto-flagged items track real state, you cannot simply tick them Done — you resolve the underlying work (return the assets, clear the loan) or mark the item Waived with a note. As items are completed, the clearance status moves from Pending to In Progress to Ready to Settle. Only when everything is Ready to Settle can you complete the settlement.
Preview the settlement
The separation detail page shows a live Settlement Preview so you can see the numbers before committing:
- Years of service and last basic salary, from the salary assignment in force on the last working day (or the separation date when no last working day is recorded). The last basic is the one payroll pays: what the salary structure's Basic component gives on the employee's gross. Only when the structure has no Basic component is the whole gross used.
- Leave encashment — for each leave type whose policy allows encashment, the unused balance of the current fiscal year × the per-day figure, itemised by leave type. The per-day figure follows the policy's Encashment Basis: a multiple of the employee's daily basic pay (monthly basic ÷ 30), or a fixed amount per day (see Leave encashment). For a type that accrues monthly or quarterly, only the days accrued so far count.
- A warning under the figures for each encashable leave type that cannot be priced: its policy has no rate, or it is priced in days of basic pay and the employee's salary structure gives no basic pay. That type's days are left out of the settlement, and stay in the balance, until you set the rate or add basic pay to the structure. Encashment never falls back to the gross.
- Gratuity — the end-of-service award under the rule for your workspace's country. That rule sets the minimum service, the formula and the wage it is worked out on (basic, or the full wage). An employee below the minimum gets none, and the preview says how many years the rule needs. Where the country has no end-of-service gratuity rule, the preview shows Not applicable. See Multi-country & currency.
- Provident Fund balance, for an employee with a provident fund. For anyone else the preview has no PF line, and its total reads Cash settlement.
- Outstanding loans.
Complete the final settlement
Click Complete Settlement to finalise. In the dialog you choose how to handle the Provident Fund (asked only for an employee with a provident fund; for anyone else no PF option is recorded) and whether to issue the experience certificate:
| PF settlement type | Effect |
|---|---|
| Full withdrawal (paid to employee) | PF balance is paid out and added to the cash settlement |
| Transfer to another PF trust | PF is moved to a named trust — you must enter the recipient |
| Forfeit (write-down to zero) | PF is written off and paid to no one |
The final cash payout is:
final cash = leave encashment + gratuity + (PF only when withdrawal) − outstanding loans
You can override the auto-computed gratuity (for example, forfeiting it on a misconduct termination), and untick the experience-certificate option if you don't want one issued.
If your workspace has a provident fund set up under Contribution funds that is paid into a fund account, a government body or a provider, the PF is paid from there, not from the salary account: it is left out of the cash settlement above, and a withdrawal or transfer is recorded on the fund as a leaver payout. A forfeit leaves the money in the fund. A provident fund kept on your books changes nothing here: the PF is paid with the cash settlement, as above.
Completing settlement is permanent. In one step it writes the PF ledger entry (for an employee with a provident fund), records leave encashment, posts the payout as a (non-taxable) payroll adjustment for the current month, and flips the employee's status to separated. If the employee's onboarding pipeline is still open, it is closed as Cancelled and the change is recorded in the activity log. If the net comes out negative — loans exceed everything else — it is posted as a deduction the employee owes. Separated is a terminal status written only by settlement — it cannot be picked by hand from the profile Status menu, the menu offers no other status for a separated employee, and a separated employee can no longer be assigned a salary structure. To employ the person again later, use Rehire on their profile: it starts a new employment on the same record and leaves this settlement as it is. See Rehiring a former employee.
After settlement, the experience certificate is generated through HR Letters and the employee is emailed a summary of the settlement with the certificate PDF attached (sent to official and personal email).
Paying the settlement
Monthly payroll pays active employees only, so no payroll run pays a separated employee's settlement. Pay the Final Cash Settlement directly, by bank transfer or cheque, and keep your own record of the payment; a net amount the employee owes is collected the same way. The settlement's adjustment stays approved under Payroll › Adjustments, and it does not mark the month's payroll run as out of date.
The settlement does not include salary. Run and lock the employee's last month of payroll before you complete the settlement.
Account closure and the grace period
A configurable grace period (default 30 days, set under /admin/settings/offboarding) governs when the person's access to your workspace ends. What closes at the end of it is the membership in your company — not necessarily the person's whole account:
- Sign-in email is a personal address — the account stays active after the membership closes, ready for a future employer on the platform (and any other companies they belong to are untouched).
- Sign-in email is a company-owned official address and no other active membership remains — the whole account goes dormant at closure: login and password reset stop working. This protects the person if your company later recycles that mailbox to someone else. A dormant account is revived only by a new invitation/membership, with a forced password setup.
A daily job, shortly after 10:00 workspace time, sends the "account closing soon" warning five days before the grace period ends and closes the membership once it has ended. Someone rehired before then with Invite to portal keeps their sign-in, and the job no longer counts down on that separation.
The seeded "account closing soon" warning email tells employees who sign in with a company address to switch to a personal one before closure (My Account → Sign-in & Security at /profile). Under the official-email-locked sign-in policy, that switch becomes possible at separation — the grace period exists precisely so it can be used.
Managing separations requires the offboarding.manage permission; viewing requires offboarding.view.
What HR sees by email
| Event | Who is notified |
|---|---|
| Onboarding started | HR |
| Onboarding task assigned | The assigned user |
| Onboarding completed | The employee |
| Probation ending soon | HR (daily digest) |
| Employee confirmed | The employee (with letter) |
| Separation initiated | The employee and HR |
| Clearance completed | HR |
| Final settlement paid | The employee (with certificate) |