Expense claims
The Expense claims module lets employees ask to be reimbursed for money they spent on the company's behalf — travel, meals, software, training, and so on. Each claim goes through a two-step review (the employee's reporting manager first, then HR/Finance), and once HR gives final approval the amount is added to the employee's next payroll automatically as a non-taxable reimbursement.
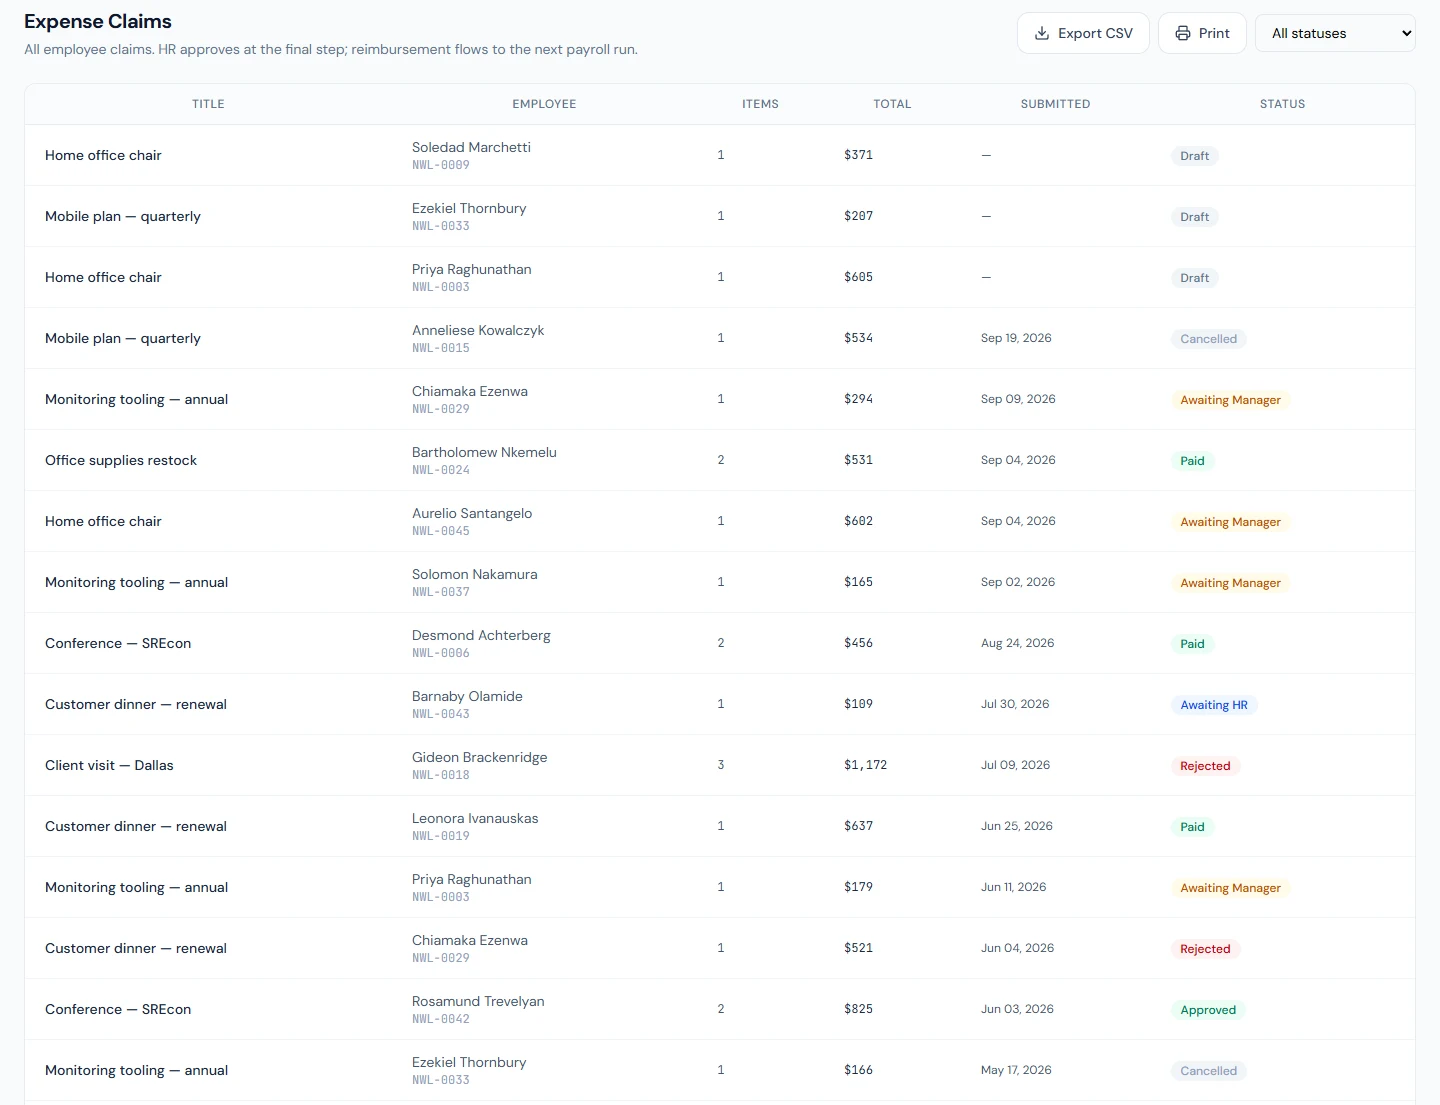
There are two sides to the module:
- Employees work in the portal under My Expenses and, if they manage a team, Team Expenses.
- HR / Finance and admins work in the admin area under Expense Claims and Expense Categories.
Who can do what
Access is controlled by four permissions. A role can hold any combination of them.
| Permission | Lets the holder… |
|---|---|
| Submit Own Expense Claims | Create, edit, submit, and cancel their own claims (the portal My Expenses pages). |
| Approve Team Expense Claims (Manager) | See and approve/reject claims from their direct reports (Team Expenses). |
| Final-Approve + Configure Expense Module (HR/Finance) | Give final HR approval, reject, and manage expense categories. |
| View All Expense Claims | See every claim in the workspace on the admin list. |
The claim lifecycle
A claim moves through these statuses. The label in brackets is what appears on screen.
| Status | Shown as | Meaning |
|---|---|---|
draft | Draft | Being written; only the owner can see and edit it. |
submitted | Awaiting Manager | Sent for approval; waiting on the reporting manager. |
manager_approved | Awaiting HR | Manager approved; waiting on HR/Finance. |
approved | Approved | HR approved; a payroll adjustment has been created. |
paid | Paid | The payroll run that reimbursed it has been locked or paid out. |
rejected | Rejected | Turned down by the manager or HR, with a reason. |
cancelled | Cancelled | Withdrawn by the employee. |
The normal path is:
draft → submitted → manager_approved → approved → paid
with two side exits — rejected (by a reviewer) and cancelled (by the employee).
HR/Finance can approve a claim directly from Awaiting Manager without waiting for the manager step — useful when the claimant has no reporting manager set, or when Finance handles approvals centrally.
For employees: submitting a claim
Go to My Expenses (/portal/expenses) and select New Claim.
- Give the claim a Title (for example, "Chicago client trip — May 2026") and an optional Description.
- Add one or more line items. Each line item has:
- Category — pick from the list (required).
- Date — when the expense happened (required).
- Amount — must be greater than zero (required). The field is labelled with your workspace currency.
- Description — optional note about what it was for.
- Receipt — optional. Select Upload receipt to attach an image or PDF. You can replace it later.
- Use Add line for each additional expense. The running Total updates automatically as you type.
- Finish in one of two ways:
- Save draft keeps the claim private and editable so you can come back to it.
- Submit for approval sends it to your reporting manager (status becomes Awaiting Manager).
Attach a receipt to every line item where you can. Reviewers can open each receipt directly from the claim, which makes approval faster.
Editing, viewing, and cancelling
- A claim can only be edited while it is a Draft. Open it and select Edit to change the title, line items, or receipts. Once submitted it is locked from editing.
- You can Cancel a claim while it is a Draft, Awaiting Manager, or Awaiting HR. You cannot cancel a claim that has already been approved or paid.
- Open any claim from My Expenses to see its line items, receipts, status, and — once approved — which payroll month it will be reimbursed in.
For managers: approving your team's claims
If you have the manager permission, Team Expenses (/portal/team-expenses) shows claims your direct reports have submitted and that are waiting on you (status Awaiting Manager).
For each claim you can:
- Expand View items to see the line items, amounts, and any attached receipts.
- Select Approve to pass it up to HR/Finance (status becomes Awaiting HR).
- Select Reject and enter a reason. The reason is shown to the employee.
Only the claimant's own reporting manager can approve or reject at this step, and only while the claim is still Submitted. Once you approve or reject, the claim leaves your queue; after that, only HR/Finance can turn it down.
For HR / Finance: final approval
The admin Expense Claims page (/admin/expenses) lists every claim in the workspace. You can:
- Filter by status using the dropdown.
- Export CSV or Print the current list.
- Select any row to open the claim detail.
On the claim detail page (/admin/expenses/:id), when a claim is Awaiting Manager or Awaiting HR you will see two actions:
- HR Approve — gives final approval. This is the step that triggers the payroll reimbursement (see below).
- Reject — turns the claim down; you must enter a reason, which the employee sees.
You cannot approve a claim whose total is zero, and you can't approve or reject your own claim while someone else with expense management access can decide it. In a workspace where you're the only one, you still can.
What happens on HR approval
When you select HR Approve, the system does two things in a single step:
- Marks the claim Approved and records who approved it and when.
- Creates a payroll adjustment for the employee so the reimbursement is picked up by the next payroll run.
The payroll adjustment is created with these characteristics:
- It is an addition (money paid to the employee).
- It is non-taxable — reimbursements are not treated as taxable income.
- It is dated for the current month (in
YYYY-MMform), and its reason references the claim title.
The claim detail then shows a confirmation banner with the linked payroll adjustment and the month it belongs to. The employee sees the same information on their own claim ("Will be reimbursed in your … payroll"). Once that payroll run is locked or paid out, the claim shows as Paid.
HR approval is what puts money into payroll — there is no separate "pay" button. Review the line items and receipts before approving, because the reimbursement will flow into the payroll run for the month it was approved in.
Managing expense categories
Categories are the taxonomy employees choose from on each line item. Manage them at Expense Categories (/admin/expenses/categories) — this requires the HR/Finance permission.
Every new workspace starts with eight built-in categories:
- Travel
- Meals & Entertainment
- Office Supplies
- Software & Subscriptions
- Training & Conferences
- Communications
- Client Hospitality
- Other
To add your own, select New Category and give it a Name (required), an optional Icon (a Lucide icon name such as Plane), and an optional Description. You can edit a category at any time, and toggle Show inactive to view categories you have deactivated.
When you delete a category:
- If it is not used on any claim, it is removed.
- If it is used on existing claims, it is deactivated instead of deleted, so historical claims keep their category. Inactive categories no longer appear when employees create new claims.
Email notifications
The module sends automatic emails at each stage (using your workspace's email templates):
| When | Who is notified |
|---|---|
| A claim is submitted | The claimant's reporting manager, plus HR/Finance. |
| A manager approves a claim | HR/Finance. |
| HR approves a claim | The employee. |
| A claim is rejected | The employee (with the rejection reason). |
Quick reference: where things live
| Page | Route | For |
|---|---|---|
| My Expenses | /portal/expenses | Employees — list of your claims. |
| New / Edit claim | /portal/expenses/new | Employees — create or edit a draft. |
| Team Expenses | /portal/team-expenses | Managers — approve direct reports' claims. |
| Expense Claims | /admin/expenses | HR / Finance — all claims, filter, export. |
| Expense Categories | /admin/expenses/categories | HR / Finance — manage categories. |