Profile & security
Two different screens hold "your details", and the distinction matters:
- My Profile in the portal (
/portal/profile) — the company's approved copy that payroll, letters, and verifications run on. Read-only. - My Account (
/profile, from your avatar menu) — the profile you own, which travels with you across every workspace you belong to. Fully editable.
Your profile in the portal: the employer's copy
My Profile shows the personal details your employer has on record for you. A banner at the top explains that updates are made from My Account, with an Edit in My Account button that takes you there. Changes you submit appear here once HR approves them.
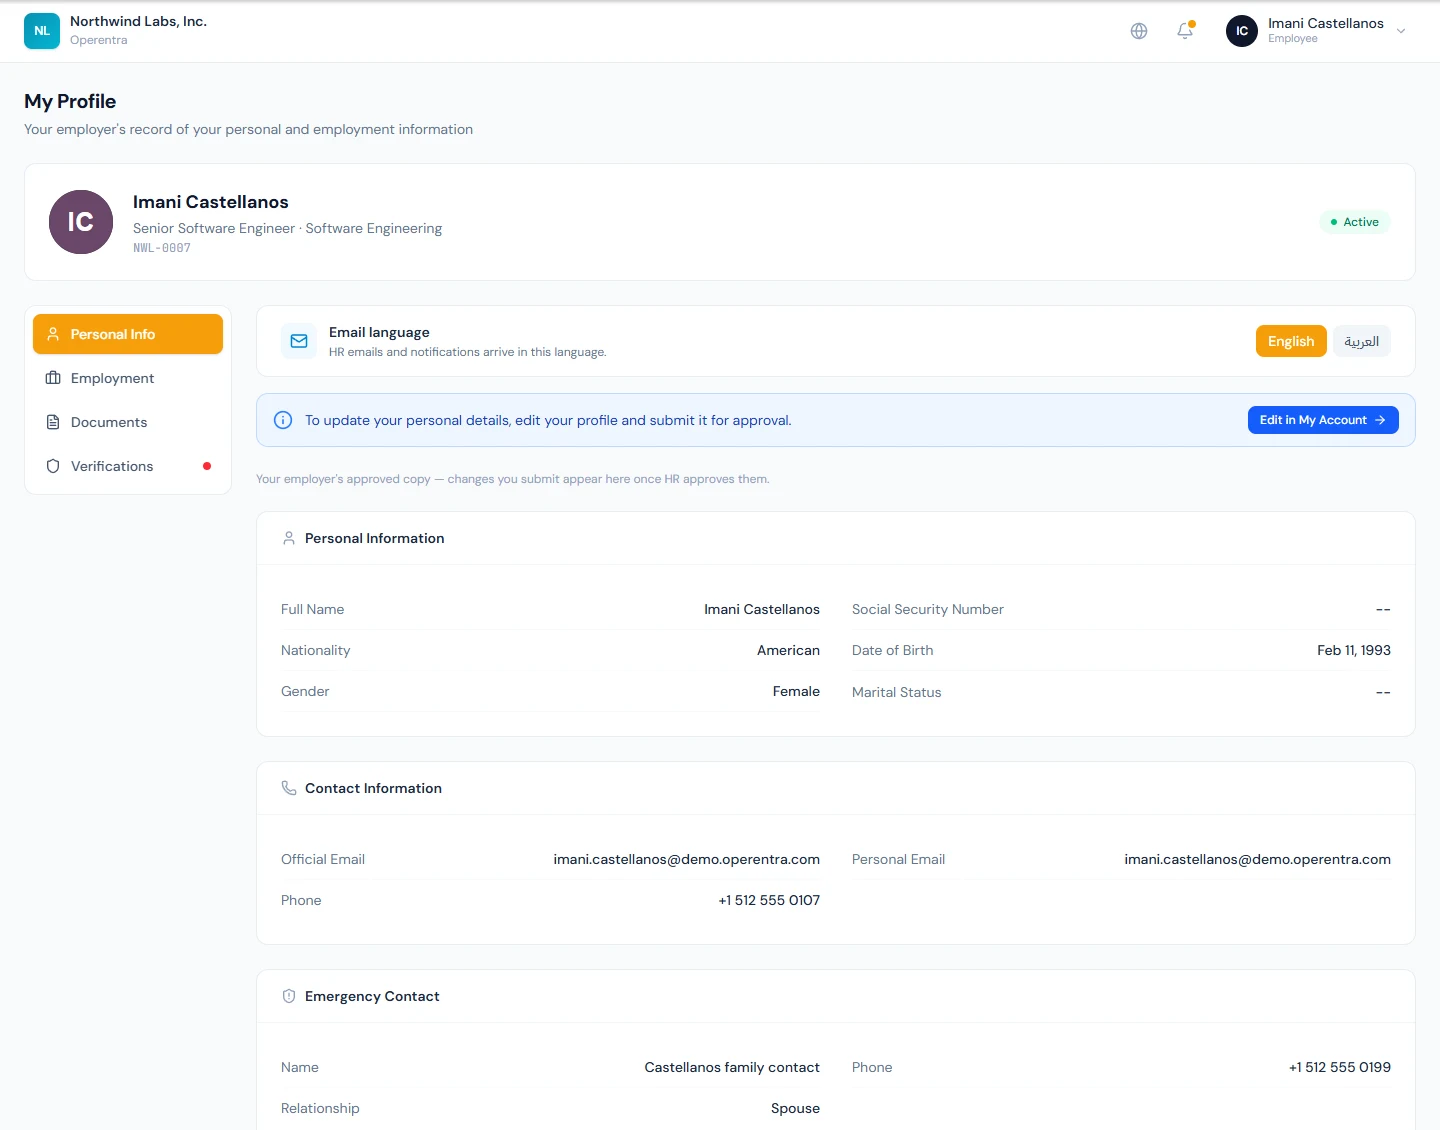
The one thing you can change here is your Email language — the compact selector at the top of the profile tab controls which language HR emails and notifications arrive in.
The page keeps its other tabs — your employment details, Documents, and Verifications — for uploading documents and completing verification steps.
My Account: the profile you own
This is your personal master record: name, identity numbers (plus father's name where your country records it), date of birth, marital status, personal email, phone, emergency contact, your addresses, and your primary bank account. You can edit all of it freely, at any time — nothing you change here reaches any employer automatically.
Sharing changes with your employers
When your profile differs from what an employer has on record, a Share with your employers card appears, listing each company where your changes are not yet shared. To send your changes:
- Tick the companies you want to update — it is your choice, per company.
- Click submit. Each selected company's HR receives your snapshot for review.
What happens next:
- Approved — the company copies your submitted details into its employee record. If your phone, emergency contact, or an address changed, the company may ask you to verify them again.
- Returned — HR sends it back, optionally with a note explaining what to fix. Your profile keeps your edits; correct them and share again.
Either way you are notified by email. Companies whose copy already matches your profile are not offered, so you can never spam HR with no-op reviews.
If you were invited to the portal as a new hire, your employer may be waiting for your first profile submission — HR did not enter your personal details for you. Complete your profile and share it with them; the card highlights employers still waiting.
Employments
An account-wide history of every company where you hold or held an employee record — current and ended, with your designation, department, and joining/separation dates. Because these records belong to your account, they remain visible here even after an employment ends.
Sign-in & Security
Your credentials — one set for every workspace you belong to:
- Change password — requires your current password. Because one password covers your whole account, changing it signs you out of every company you belong to.
- Sign-in email — change the address you sign in with. Enter the new address and your current password; a confirmation link is emailed to the new address (valid for 60 minutes) and a heads-up goes to the old one. Nothing changes until you click the link — then every session is signed out and future sign-ins use the new address in every company at once.
If any company you're an active member of enforces the official email only sign-in policy, the email change is blocked with a clear message until you leave that company.
If you sign in with a company-owned address and are leaving the company, switch your sign-in email to a personal address during the offboarding grace period — otherwise your account goes dormant when the membership closes.
Two-factor authentication
2FA adds a second sign-in step: after the password, you enter a 6-digit code from an authenticator app on your phone (Google Authenticator, Authy, 1Password, Microsoft Authenticator — anything TOTP-compatible). It protects your account, not one workspace: enroll once and the code step applies to all of your sign-ins.
To enable it:
- Open My Account → Sign-in & Security.
- On the Two-Factor Authentication card, click Enable two-factor authentication.
- Scan the QR code with your authenticator app (or type the setup key manually), then enter the 6-digit code the app shows.
- Save the recovery codes. They are shown exactly once — copy or download them and store them somewhere safe (a password manager is ideal).
Each recovery code signs you in once if you don't have your phone; the card shows how many you have left, and you can generate a fresh set at any time.
If you lose your authenticator and your recovery codes, ask a workspace administrator to reset your 2FA — you'll sign in with just your password and can re-enroll. After 5 wrong codes, the 2FA step locks for 15 minutes.
Some workspaces make 2FA mandatory. You'll be walked through setup at your next sign-in, and you can't disable it while you belong to a workspace that requires it.
Switching workspaces
If your account belongs to more than one company, click the company name in the top bar to switch between them — each company sees only its own data, and your role can differ in each.